
Last month we (Seth Sandler and yours truly) released the Android port of the popular iPhone/iPad music application NodeBeat.
NodeBeat was created by Seth Sandler and Justin Windle earlier this year and released in April for the iOS platform. It is an experimental node-based audio sequencer and generative music application. By combining music and playful exploration, NodeBeat allows anyone to create an exciting variety of rhythmic sequences and ambient melodies in a fun and intuitive fashion.
How Does it Work?
Octaves and Notes make up the two types of nodes. Octaves pulse and send messages to Notes within proximity. Each Octave is assigned a random octave and each Note, a random note; therefore, a Note will play in several octaves depending on the Octave it’s connected to. Pause nodes to create your own beats or let them roam free to have them generate their own.
Cross platform development
Because NodeBeat was developed using the C++ based open source framework openFrameworks, I did not expected a lot of trouble getting the core to work on Android. However, since the Android port of openFarmworks is still pretty new (we’re using the development branch) and officially only supported on the Mac and Linux platforms, I decided to put some effort into making it work on Windows as well. I’m a Windows user and developer, so if I can avoid dualbooting, I will :P.
Native Development Kit
As soon as you want to use C or C++ in your Android projects, you will have to install the Native Development Kit (NDK). It basically allows you to compile your code into a library which you can access using JNI calls. While in general it is recommend to code using the SDK in Java for your Android projects (the Dalvik VM with JIT show really good performance), lazy coders (like me :P) are always trying to find ways to reuse existing code. Instead of having a native codebase for iOS (in Objective-C) and Android (in Java), it is nicer to have a shared core in C++ with a thin layer (Obj-C or Java) to interface with it. Sure the NDK might sound intimidating at first sight and Google doesnt recommend it unless you know what you’re doing, but honestly I don’t think its rocket science either. After downloading the NDK, you will need to setup a unix like environment such as MinGW or Cygwin.
For my previous projects I already had MinGW installed (you could use Cygwin, but in general I don’t like their approach). I did a fresh checkout from Github and started to mess around with the Makefiles to see if it would compile.
It turned out that all I had to do is replacing a few IF statements (the ones that are checking the build platform) and make them point to the NDK location on my Windows computer. I’ve created a tutorial that explains the steps if you want to try it out yourself. However, if you want to use openFrameworks for your own Android applications, I would highly recommend just using my openFrameworks fork instead (until they accept my pull request). It includes all the patches from the tutorial and it should be compatibly with the latest NDK. The tutorial actually also explains how to run one of the examples so be sure to check that out.
Porting the GUI
For the UI I wanted to stay as close to the iOS version as possible. As I don’t own an iOS device, Seth gave me some screenshots of NodeBeat running on iOS which I used as a reference.
Since the iOS and Android framework are quite distinct, there are cases where I had to do an alternative implementation. For example, on Android most devices have the following buttons:
- Back
- Menu
- Home
- Search
The iOS devices only have one button which brings you back to the home screen. In the original implementation of NodeBeat on iOS, there is a shortcut on the canvas that popup a menubar allowing you to access different option menus. On Android however we can use the options menu which allows us to control the flow of the application.
Example: Menu bar
So instead of writing the menu code in C++, I only had to create a XML file for the option menu. It looks like this:
<?xml version="1.0" encoding="utf-8">
<menu xmlns:android="http://schemas.android.com/apk/res/android">
<item android:icon="@drawable/node_icon" android:id="@+id/node" android:title="Node"/>
<item android:icon="@drawable/audio_icon" android:id="@+id/audio" android:title="Audio"/>
...
</menu>
Basically you define a unique id (this allows you to reference it in the Java source code), tell it which icon to use and give it a title. You need to do this for every entry, but apart from that, the Android framework will handle how to display it (depending on orientation and the number of menu items) After the user touches the menu button on Android, it will popup the option menu:


Example: Audio menu
Other menu elements such as the popup menu for the Audio, Rhythm and Settings menu required a different approach. I could’ve switched Views on Android, but in my opinion that would be a bad UI design decision. The problem with this is that the user would be taken away from the NodeBeat activty. Instead I much more prefer to use the context menu that the Android framework provides. This menu popups up and is placed over your current Activity. While it is on the foreground, the activity in the background is still visible and continues running. Another benefit of this approach is that the user will get immediate feedback when adjusting the audio settings. As like the menu, this UI layout is created entirely in XML.


Example: Recording dialog
In some cases the context menu might be a bit of overkill if you want to let the user decide on a question. For example, in the example below we want to inform the user how to record his NodeBeat creation. All we need is a simple dialog that either lets the user confirm the action or decline it. In such cases Android provides dialogs which can be build with an AlertDialog.Builder
AlertDialog.Builder builder = new AlertDialog.Builder(this);
builder.setMessage("You can stop recording by pressing the record button in the menu again")
       .setCancelable(false)
       .setPositiveButton("Yes", new DialogInterface.OnClickListener() {
           public void onClick(DialogInterface dialog, int id) {
                // Start recording
           }
       })
       .setNegativeButton("No", new DialogInterface.OnClickListener() {
           public void onClick(DialogInterface dialog, int id) {
                dialog.cancel(); // Cancel dialog
           }
       });
AlertDialog alert = builder.create();
alert.setTitle("Start recording");


Using JNI Callbacks
After we’ve ported the UI, we still need to pass on our settings to the core application. Fortunately we can use JNI callbacks to get and set NodeBeat’s properties. It is good to know that you should minimize the number of JNI callbacks for performance reasons (so don’t go mental and call tons of JNI methods each time you render a frame).
Let say we would like to pass a value from one of the sliders from the Audio context menu to our NodeBeat core. In such case we first create a new static method in our Java source file:
OFActivity.java
public static native void sliderChanged(float v);
It is important to use the static and native keyword when you define your method. This is all we need to do in our java code and this method can be used anywhere in our java class.
Now the tricky part is how to implement the function on the C++ side of your application. It’s not exactly complex, but you will have to pay attention to a few details. Three things are important here:
- The namespace (in Java)
- The class name
- The method name
If we assume we’re implementing this callback in one of the openFrameworks examples, this means:
- The namespace (in Java): cc.openframeworks.androidEmptyExample
- The class name: OFActivity
- The method name: sliderChanged
main.cpp
Here is the code you implement in C++
#include <jni.h>
extern "C"{
void Java_cc_openframeworks_androidEmptyExample_OFActivity_sliderChanged (JNIEnv*  env, jclass  thiz, jfloat value){
// Do smth here
}</jni.h>
As ugly as this method looks like, take a brief look at how it is constructed. It starts with the return type (which is void just like how we specified it in Java). Next it starts with Java_ and is succeeded by the namespace, classname , method name. All dots from the namespace are replaced by underscores and between each element we place an underscore as well.
In the arguments list, the “JNIEnv* env, jclass thiz” part is mandatory (so if you have a something like this: public static native void methodname(), it would be void methodname(JNIEnv* env, jclass thiz)). For our method we want to pass a float as argument. For some reasons you can’t just pass a float, you will need to use JNI mapping types. The float becomes a jfloat.
Note: for booleans you need to compare the value to JNI_TRUE or JNI_FALSE and not to true or false.
Honeycomb Tablets
Unlike the iOS devices from Apple, Android devices run at so many different configurations and API levels, it can be a bit tricky to support all of them. For NodeBeat we decided to create two versions: A phone version and tablet version. We basically distinguish between phones who are running Eclair or Gingerbread (2.2+) and tablets running Honeycomb (3.0). On the Android Market it seems like we only provide one version, but depending on what device you’re using to download the app, it will give you a certain version.
In order to maximize the use of the display, I’m using this line in the AndroidManifest.xml file:
android:theme="@android:style/Theme.NoTitleBar.Fullscreen"
On phones it sets the application to fullscreen. While this works for anything running Android 2.2+, it is a problem on Honeycomb devices. Honeycomb tablets don’t have any physical buttons and when the application is running in fullscreen mode, there is no shortcut to the menu button. This shortcut is normally placed in the top right corner.
 Honeycomb’s menu in the top right corner
This means that for the tablet version, we run the application in regular display mode.
Other than that, NodeBeat provides a rich user experience on tablet devices such as the XOOM or Asus transfomer.
Earbleeding masterpiece created by Sharath Patali (professional coder, horrific musician)
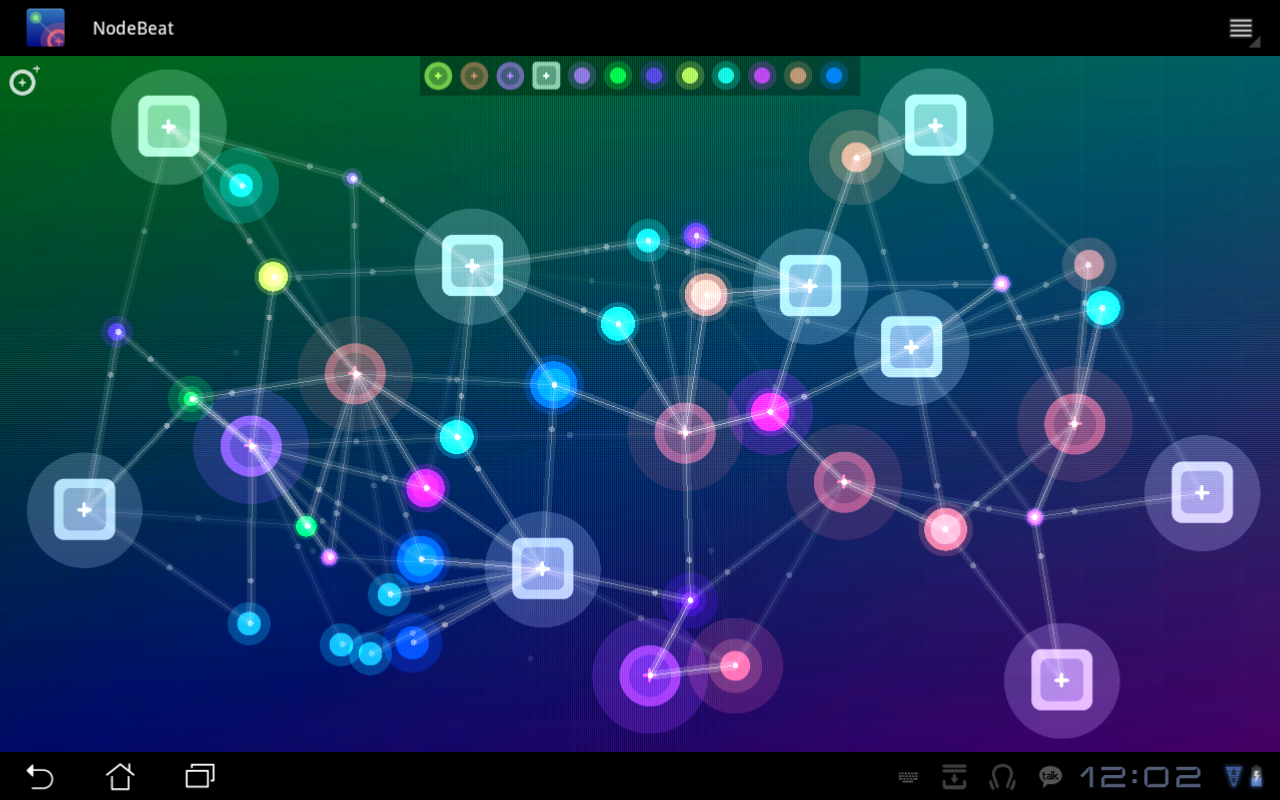 Earbleeding masterpiece created by Sharath Patali (professional coder, horrific musician)
Android Market
Publishing the app to the Android market is no hassle at all (we were just a bit unfortunate and had our app pulled down by accident). There is no annual fee (just a one time 25$) and apps are approved instantly. The dev guide provides a comprehensive overview on how to build your project in release mode and how to sign it.
Go get it!
NodeBeat is available on the Android market:
https://market.android.com/details?id=com.AffinityBlue.NodeBeat
Try it out! It’s just a dollar 🙂
Website: http://nodebeat.com/
Twitter: http://twitter.com/NodeBeat


5 responses
Yay! My masterpiece work is available for download ha ha. Nice article Laurence :)
Good job dude :) I learn the new fullscreen theme token for honeycomb. \o/
Thank you very much for yout OF android tutorial, it works perfectly for me! Watching your NodeBeat andrdoid port, I’m corious what sound engine you were using? If it was LibPD can you help me, how did you managed to integrate it? Is it ofxPd or PD-for android? Thanks you very much
It uses libpd, its available from: https://github.com/danomatika/ofxPd
Hi, interesting article, i find some answer to my questions, but there is a question i can’t resolve : how can i modify a variable into openFrameworks, from a java action, by example a button from an Android ui, like a menu bar button ? I hope i’m clear, regards